9 Product Photography Ideas for your Ecommerce Store
The brain can identify and process images after seeing them for only 13 milliseconds. After the product itself, the photos of products are the most important thing any ecommerce business needs to succeed.
When shopping online, photos can make or break the sale. A survey from Weebly showed that 75% of online shoppers agree product photography is very influential to their purchases. And 22% of returns are attributed to the fact that items look different in photos than they do IRL.
So whether you’re selling makeup or moisturizer, slippers or sweaters, your product photography matters.
Types of Product Photography
Great photos are important. Check. But there are so many different types of product photography you can use, it’s hard to know which ones are best for your brand and business.
According to Salsify, 73% of shoppers need three or more photos to make a decision. That means, you can make them all the same or play around with different types of product photography.
From studio product images and close-up shots to 360-degree images, your options are limitless. The key is to think outside the box and seek ways to make your pics stand out.
Also, note that each type of product photography requires a different approach.
For example, you may want to use a solid white background for catalog images or when trying to minimize distractions. This can also be a great choice for individual shots like a colorful dress or statement necklace, regardless of the light source.
Lifestyle photography, on the other hand, allows customers to see your products in action. Plus, it's an opportunity to share the story behind your brand. Such photos are ideal for adverts, social media, email marketing, and other visual platforms.
Start by Choosing the Right Background
Regardless of what you’re selling, all product photos have one thing in common: the background.
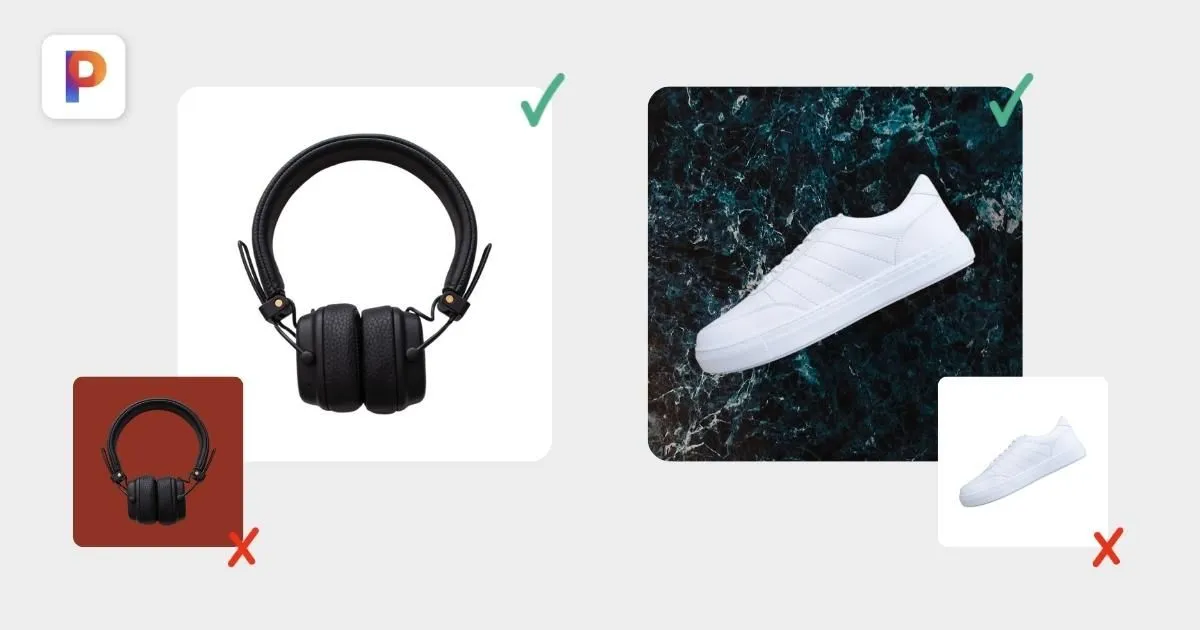
The background can be all white – this helps make your product stand out in contrast to a stark, white backdrop. Or you can pick a brand color like blue, pink, red… or any other color under the rainbow. The options are endless. The only rule is really that the details of your product are clearly visible and not overtaken by the background.
So, all-black headphones might not pop against a deep red background. Conversely, a pair of shiny new white sneakers won’t be clear on a background that’s white, off-white, ivory, ecru, eggshell… you get the idea.
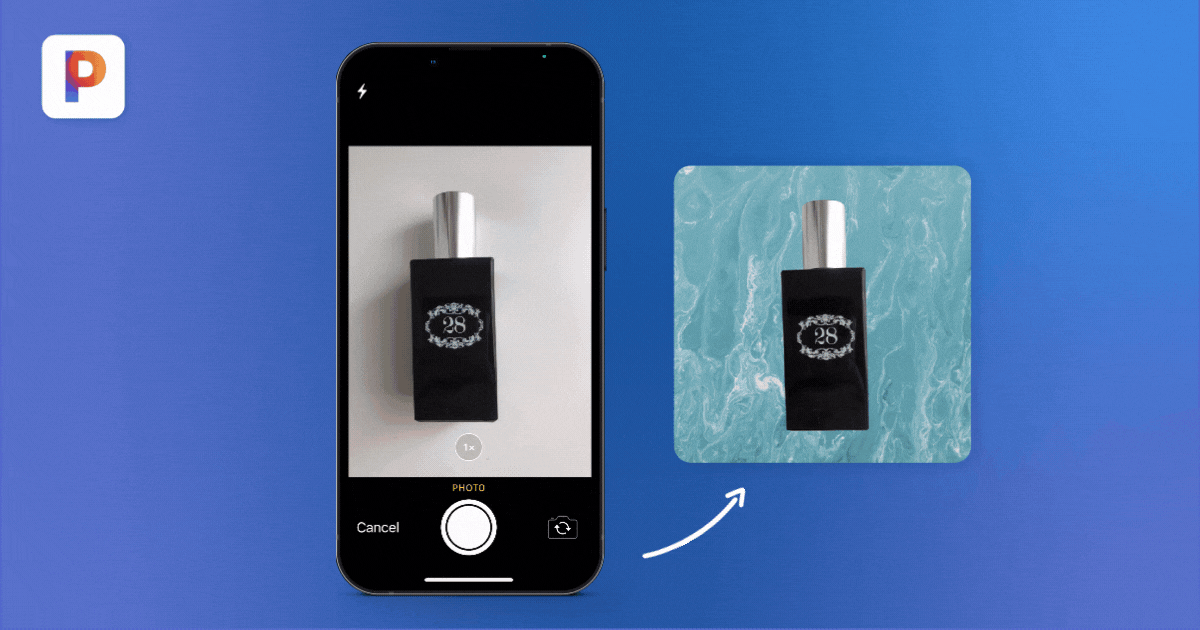
The background can be shot at the same time as you’re taking the photos or you can change them with the click of a button with apps like Pixelcut. All you have to do is take any product photo and upload it to the Pixelcut app.
With the click of a button, the app removes the background just like the pros do. Finally, you can select the color you want the background of your photos, as well as a cool backdrop like a marble, wood or fabric style. It’s that easy (and fast).
Now let's take a closer look at the different types of product photography and when to use each.
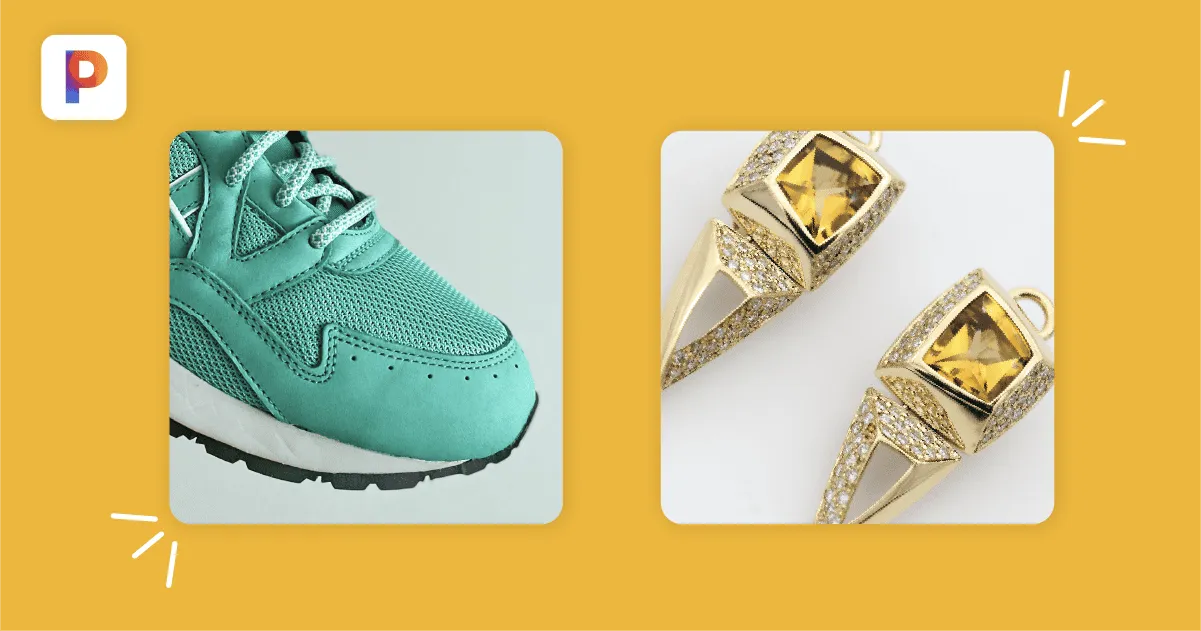
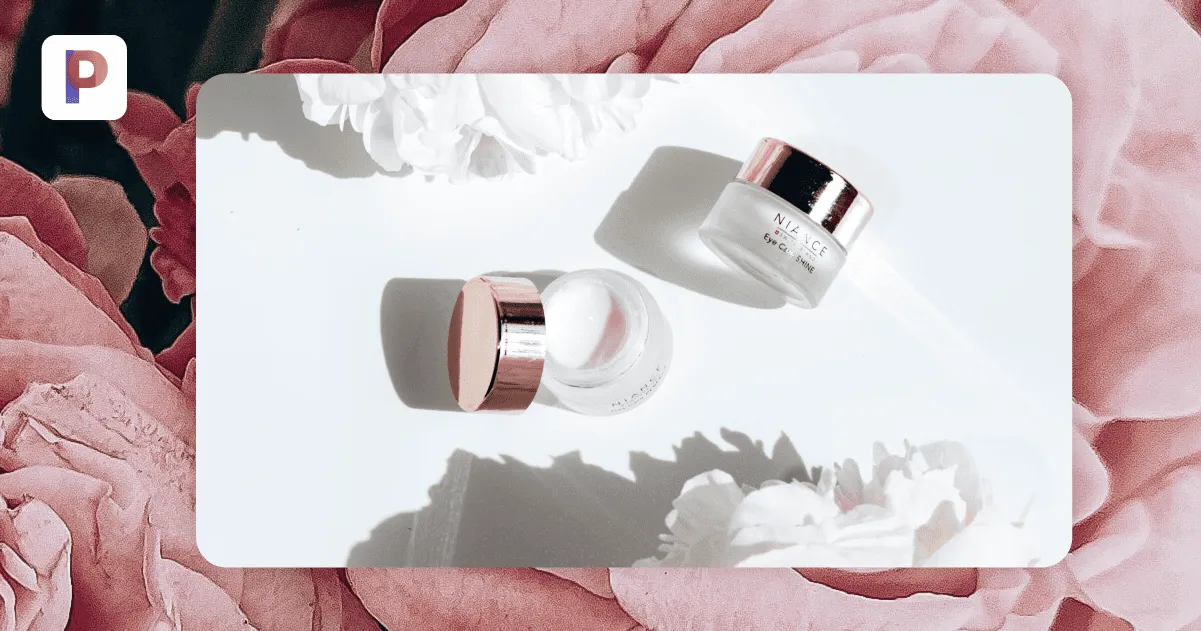
Close-Ups
The devil is in the details and if details matter to your product, then you definitely want to make sure you have close-up photos of your products. This is particularly important when you have smaller products like jewelry, or you want to show the stitching details on a fine pair of shoes.
Lifestyle Shots
Some items need to be photographed a certain way to give some context to the product. Think Goldilocks and the three bears. Understanding if something is too big or too small or just right can make all the difference to your shopper since it helps them visualize the products IRL.
Contextual photos are best for items that require an answer to “How big/small/tall/large/short/deep/wide is that?” They also help paint a picture in the mind’s eye of what your life would be like with this item (hence, lifestyle).
Like a giant swan floatie in the middle of a pool on a hot summer’s day. Or an adult holding a mug in the kitchen. Sure the mug on a plain background is great to really see the details and the shape, and of course the dimensions listed in the description will tell you whether the mug is 5” or 20” but that can be hard to picture (no pun intended). So, seeing an adult holding the mug can provide a frame of reference as to the size without having to do too much thinking.

Group product photos
You might be offering the same product in different colors or with slightly different details, such as embroidered sleeves. In this case, you can either take individual shots of each model or put them together in one image so that buyers can see all of their options on the same page.
The latter approach can eliminate the need to set up additional product pages, resulting in lower fees (depending on the platform used). On top of that, it reduces clutter and makes it easier for potential customers to find what they need.
Scale shots
While most sellers list product dimensions and other details, consumers don't always read the description or simply can't tell how big or small an item is.
For example, backpacks typically have lots of pockets and accessories, making it difficult to determine their actual size. The same goes for travel bags, toys, jewelry, and other items.
With scale shots, you can place your product next to common objects, such as a laptop, book, or tennis ball, to portray its dimensions more accurately.
Opt for a white background — or any solid background — to highlight the differences in size and make your products stand out. Again, you could turn to Photoshop to do that, but Pixelcut is so much easier to use!
Packaging shots
Some brands, especially those selling luxury items, gifts, watches, or cosmetics, put a lot of thought into product packaging — and for good reason.
As Business Insider notes, great packaging can increase brand awareness and make a product more appealing to prospective buyers. Plus, you can go one step further and use sustainable packaging materials, such as green cell foam, cellulose, or edible films for food products.
The challenge lies in giving potential customers a "feel" of the packaging before your product gets in their hands. One option is to take packshots, or packaging shots.
The pros at Photigy suggest clipping out the product from the original image and placing it on a digital background. Or you can use Pixelcut to remove the original background in seconds. Ideally, choose a background that's at least two tones brighter than your product and make sure the colors match.
Halo Top, Otherland, Hungryroot, Vinebox, and other startups are doing a great job in this regard, so you might want to check them out for inspiration.
Product Photography Ideas For Your Store
So now that you know about the different types of product photography, here are some ideas to add some pop to your pics. Make them memorable and make them Instagramable all in one shot (again, pun not intended).
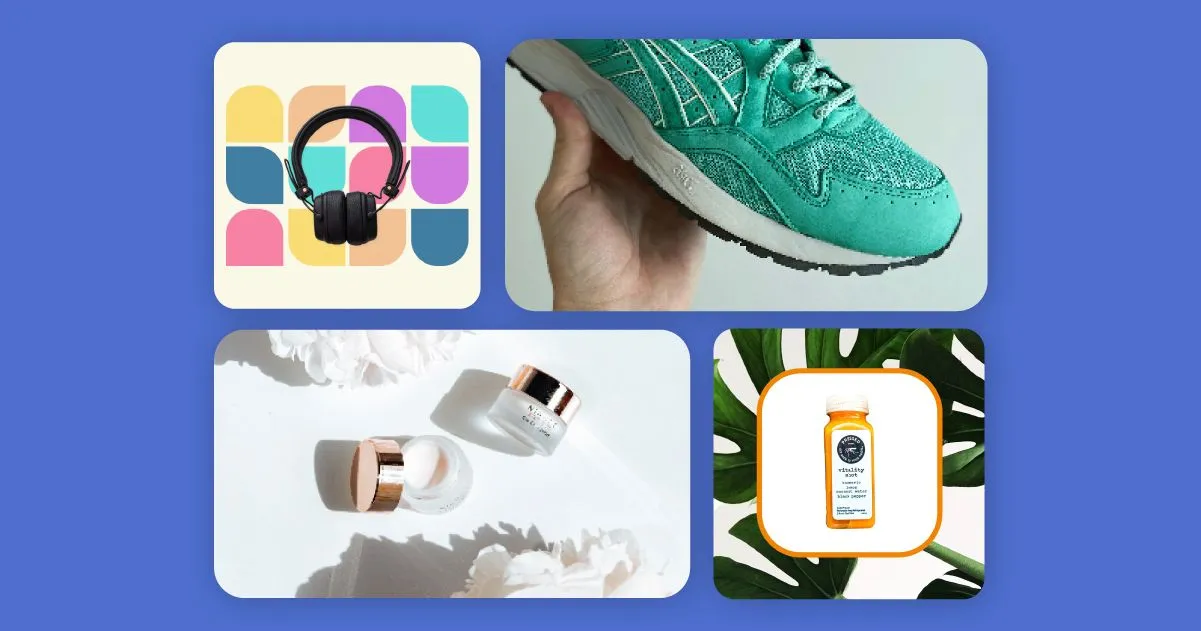
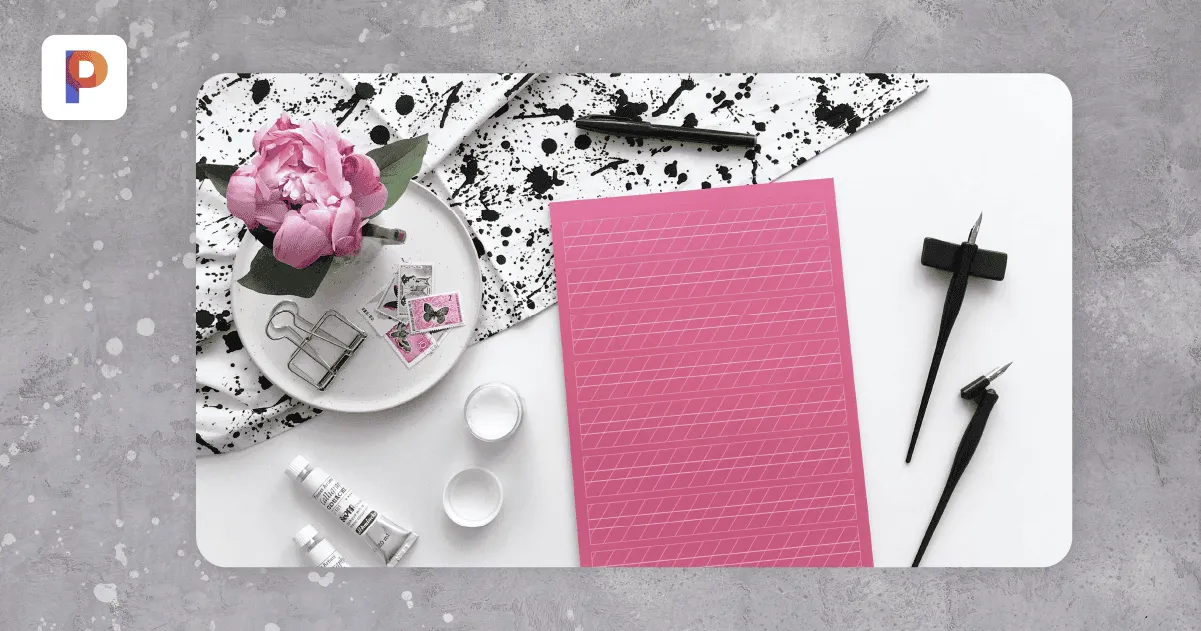
1. Add texture to your background
Instead of having just a plain background, you can use a textured or patterned background like marble, wood, sand, or tiles to create great product photos.
This can also be added directly from the Pixelcut app. Instead of selecting the color of your background, go to change or edit background and select the Stock Photos option on the bottom tab bar. From there, you can pick the style of background you want to add. With more than two million options, you can search for the perfect option to showcase your product.
2. Hang or float your products
Everyone expects products to be photographed on a flat surface. What if you shock the viewers with the product hanging from the ceiling or floating over your desk? Get them to say “Whoa, how’d they do that?”
If you’re a skilled Photoshopper, you can do it the Dunna-way.
If you’re not a graphic designer or professional photographer, you can use Pixelcut to remove the background of your photo and place it on any other background to make it appear to be floating. You can even add a shadow!
3. Think outside the usual
A pair of mittens in the fridge. Sunglasses in the sock drawer. A carton of milk in the bathroom cupboard. Putting your item in an unusual situation helps draw attention to it since it’s unexpected.
Even if you use a basic DSLR camera or smartphone, you can still take great photos and enhance their appeal later on.
For example, a lightbox would allow you to manipulate the shadows, contrast, and colors in your image and eliminate distractions. Plus, it can streamline your workflow during the editing process and make it easier to add special effects post-processing, explains the Nashville Film Institute.
You can also play with artificial light to enhance certain features of an object, increase the contrast, reduce glare, and much more. Better yet, experiment with different types of photography lighting, such as split or side lighting, broad lighting, butterfly lighting, or loop lighting.
These techniques can lead to more creative product shots and make your work stand out. Studio lighting can be your best friend, but it may also work against you, depending on how it’s used. While you don’t necessarily need a fancy lightroom to achieve that “wow” effect, it’s crucial to master the basics and practice until you get right.

4. Have fun with flat lays
Flat lays are a top-down photo of a product. You can either take a flat lay of a single product or groups of items neatly organized together. But have fun with it. Show the progress of your product (like taking Polaroid pictures).
Flat lay photos are ideal for storytelling, regardless of the type of photoshoot. You can use this technique to present product stories, recipes stories, brand stories, and everything in between. All you need is the right lighting setup and some basic props.
The experts at Nikon School recommend choosing a plain white or solid color background with different textures and using the rule of thirds for guidance. The rule of thirds involves breaking an image down into thirds and then placing your subject along those lines or where they intersect.
This technique helps create balance in photography and draws attention to the key elements of the subject. Use it for still life photos, creative product photos, portraits, or even fashion shots.
5. New props, who dis?
Use props in lifestyle shots and product photos to really make your items stand out. If you’re selling a modern watch, for example, surround it with antique timepieces to contrast the old with the new. You can also use unrelated props to make your watch stand out, like on a desk with pens, notebooks, and other desk supplies. If you’re selling beauty products or food, you can also use ingredients as props, which really lend itself to telling a cool product story.
The best part is Pixecut has an entire library of real objects and props you can easily add to your scene. Leafs, flowers, candles, and much, much, much more. On top of that, it’s faster and easier to use than traditional photo editing software.
6. Draw over product photos with text
Make your photos stand out with text around the product itself. In Pixelcut, once you select the photo you want, tap “Add” and then “Draw” to create this cool effect. You can change the font style and size as well as the color to truly make it unique.

7. Take macro shots for your eCommerce store
One of the best product photography tips on our list comes from the Nashville Film Institute, which recommends using macro shots to capture the details of a place, item, or human face. They actually offer a brief tutorial for beginners, so be sure to check it out!
Macro photography works best for product images depicting small or intricate items, such as jewelry, fabrics, or home accessories, but it's a great choice for electronics and other large objects, too. This technique is just perfect for food photography!
For example, you can take macro shots of a coffee table or leather sofa from different angles to highlight the colors and textures. Something as basic as a makeup palette or mascara brush can turn into a work of art when shot from a close distance. Burgers, risotto, smoothies, and other foods and beverages can look amazing in macro photos.
When you’re done, you can simply use the Pixelcut app to remove the background, create film stories and collages, or add special effects post-processing.
This brings to the next point...
8. Tell stories with your photos
Casper, Airbnb, Headspace, Dropbox, Oatly, and other successful companies share one thing in common: they have a strong visual identity that separates them from the rest. The images featured on their websites and social media pages are bold, eye-catching, and unique, leaving customers craving for more.
You, too, can leverage the power of storytelling to build an awesome visual identity for your Shopify or Amazon store. With Pixelcut, anyone (even beginners!) can create engaging photo stories that draw the eye and tell the story behind a product.
All you need to do is to open the Pixelcut app on your iPhone or Android device, select Film Stories or Animated Stories, and upload your photos. After that, you can edit the background, change the text color, or add frames with just a few clicks. Retouching couldn’t be easier!
9. Shoot from odd angles
Last but not least, don't be afraid to take product shots from odd angles — and have fun with it! For example, you can shoot from above or below like this product photographer did. Even the slightest change in angle can yield dramatic results.
Use this product photography technique to better illustrate the size of an object, remove distracting backgrounds, or create that "wow" effect. While there’s nothing wrong with eye-level shots, you might get better results by stepping outside your comfort zone.
A low-angle shot, for example, can make an item look bigger than its actual size and highlight the small details. A high-angle shot, on the other hand, will make your product stand out from the background, giving it a sense of depth.
You can also experiment with the Dutch angle or take wide-angle shots to achieve an edgy look. For an original touch, use natural light and creative props, such as a DIY dollhouse or sandcastle.
Bonus tip for eye-catching product photos…
If there is something in the photo that doesn’t belong there, you can easily remove it with Pixelcut’s Magic Eraser tool.
Directly in the app, you can upload the photo and easily highlight the item(s) or part(s) of the photo you want to remove, and bammo-presto, they’re gone. Photo editing couldn’t be easier!
Save Time with Templates and Create Lasting Impressions
The possibilities are endless when it comes to creating high-quality product photos for your online store. Once you find styles that work for your products and brand, why not make the process even easier by creating templates so you can recreate the perfect photos when launching new products.
In the Pixelcut app, you can create any template by putting all the elements you want to remain fixed. At the top of the screen, click the “...” and select “Create Template.” And voilà, it’s that easy. Now your template will be available on the main Templates page or in your Projects.
Best of all, you can create these templates to be the exact size you need for your ecommerce store and resize them for promoting your products on social media. It’s fast, easy and affordable, and makes your product photos pop. Join more than 10 million small businesses and entrepreneurs and start creating custom images with Pixelcut.
Ready to start creating with Pixelcut?
Join more than 70 million small businesses, creators and entrepreneurs that use Pixelcut to grow their business.